


Have you noticed all of the “First day of School” photos happening this week? Clearly, back to school is sort of a BIG DEAL!
Kids are excited, parents are excited, and teachers are excited too? Well maybe?
Anyway, my point is that social media has been flooded with new outfits, new hair do’s and big smiles of kids feeling rested, and looking shiny and new this week.
The question is, do you dread taking photos of your kids the first day of school? If so why?
Do your kids hate when you take photos of them? Do you hate the results of your photos? Are other people’s photos better than yours? Or are you like me, and you have “over photographed” your child and they are plain sick of it?
Well if you have said yes to any of these questions, please read on. I am going to show you how to take good photos of your kids, quickly, efficiently and effectively with just a few easy tips… and you don’t need a big fancy camera or special equipment to do it.
- Find the right light.
Light is everything when it comes to photography, with out it a photograph can not exist. Just like your eyes, a camera needs light to “see”. Not all light is created equally. Let me show you… Compare the next two photos: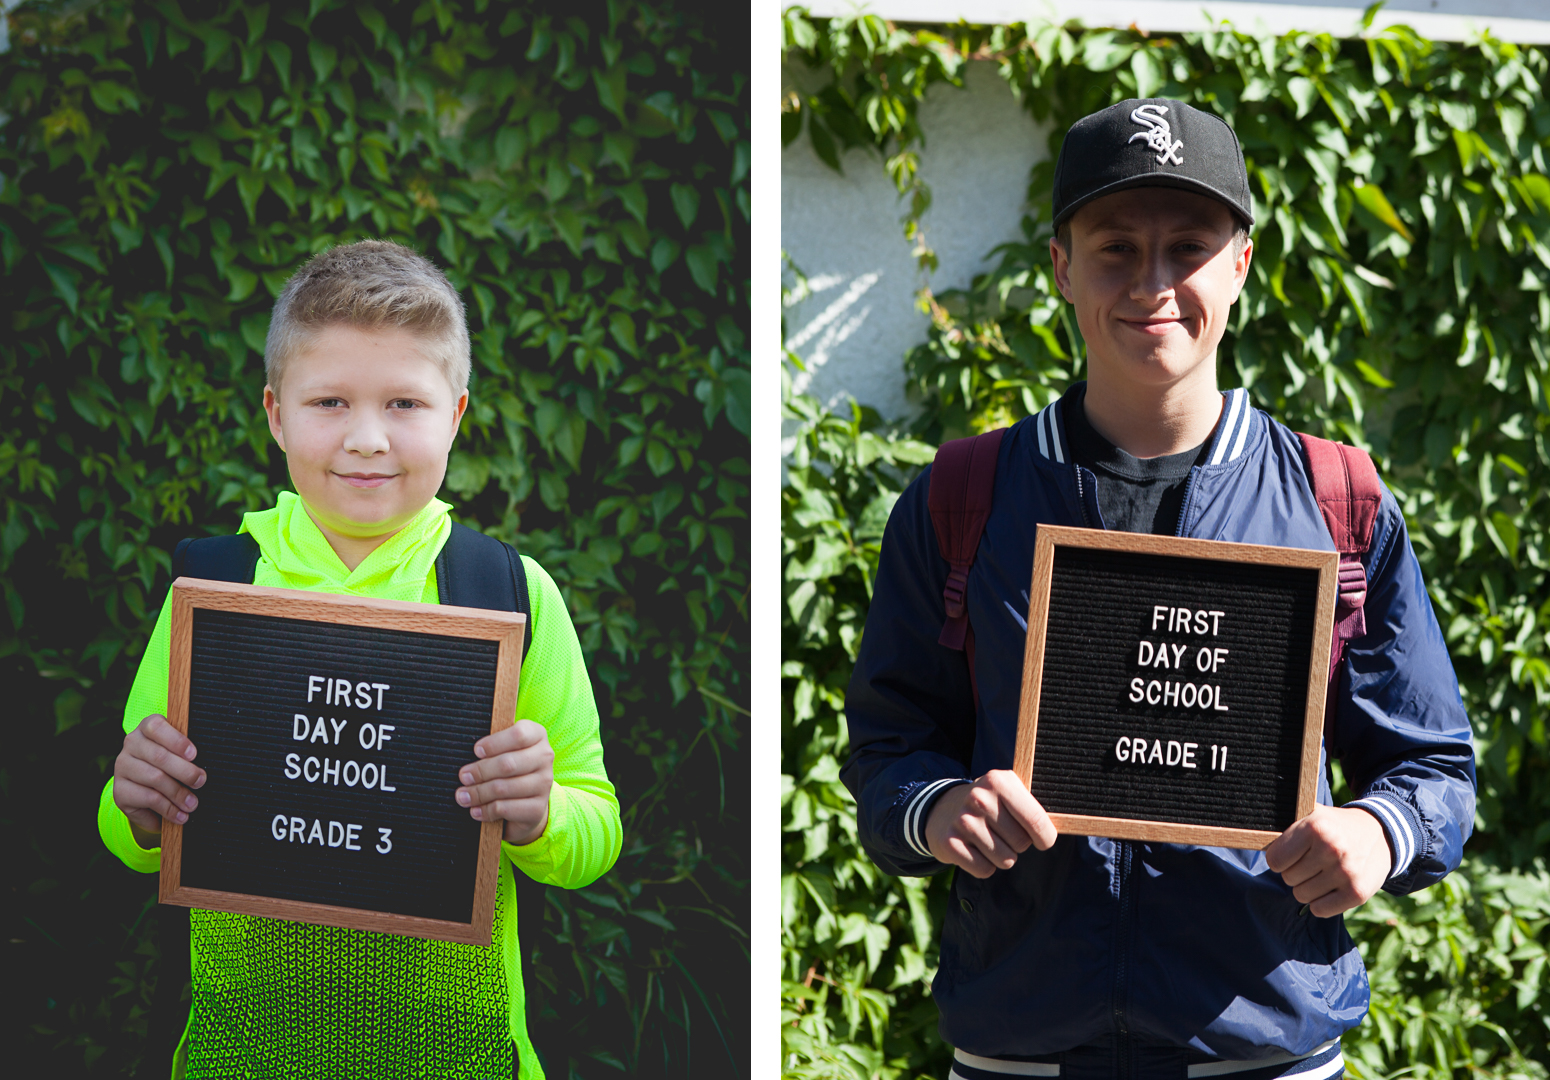 The first photo (of my son in grade 3) was taken in open shade, outside during the morning. The second photo was taken in the same spot, but around lunch time, when the sun was much higher in the sky; creating the harsh shadows from his hat, and an inability to see his eyes. So the lesson here:
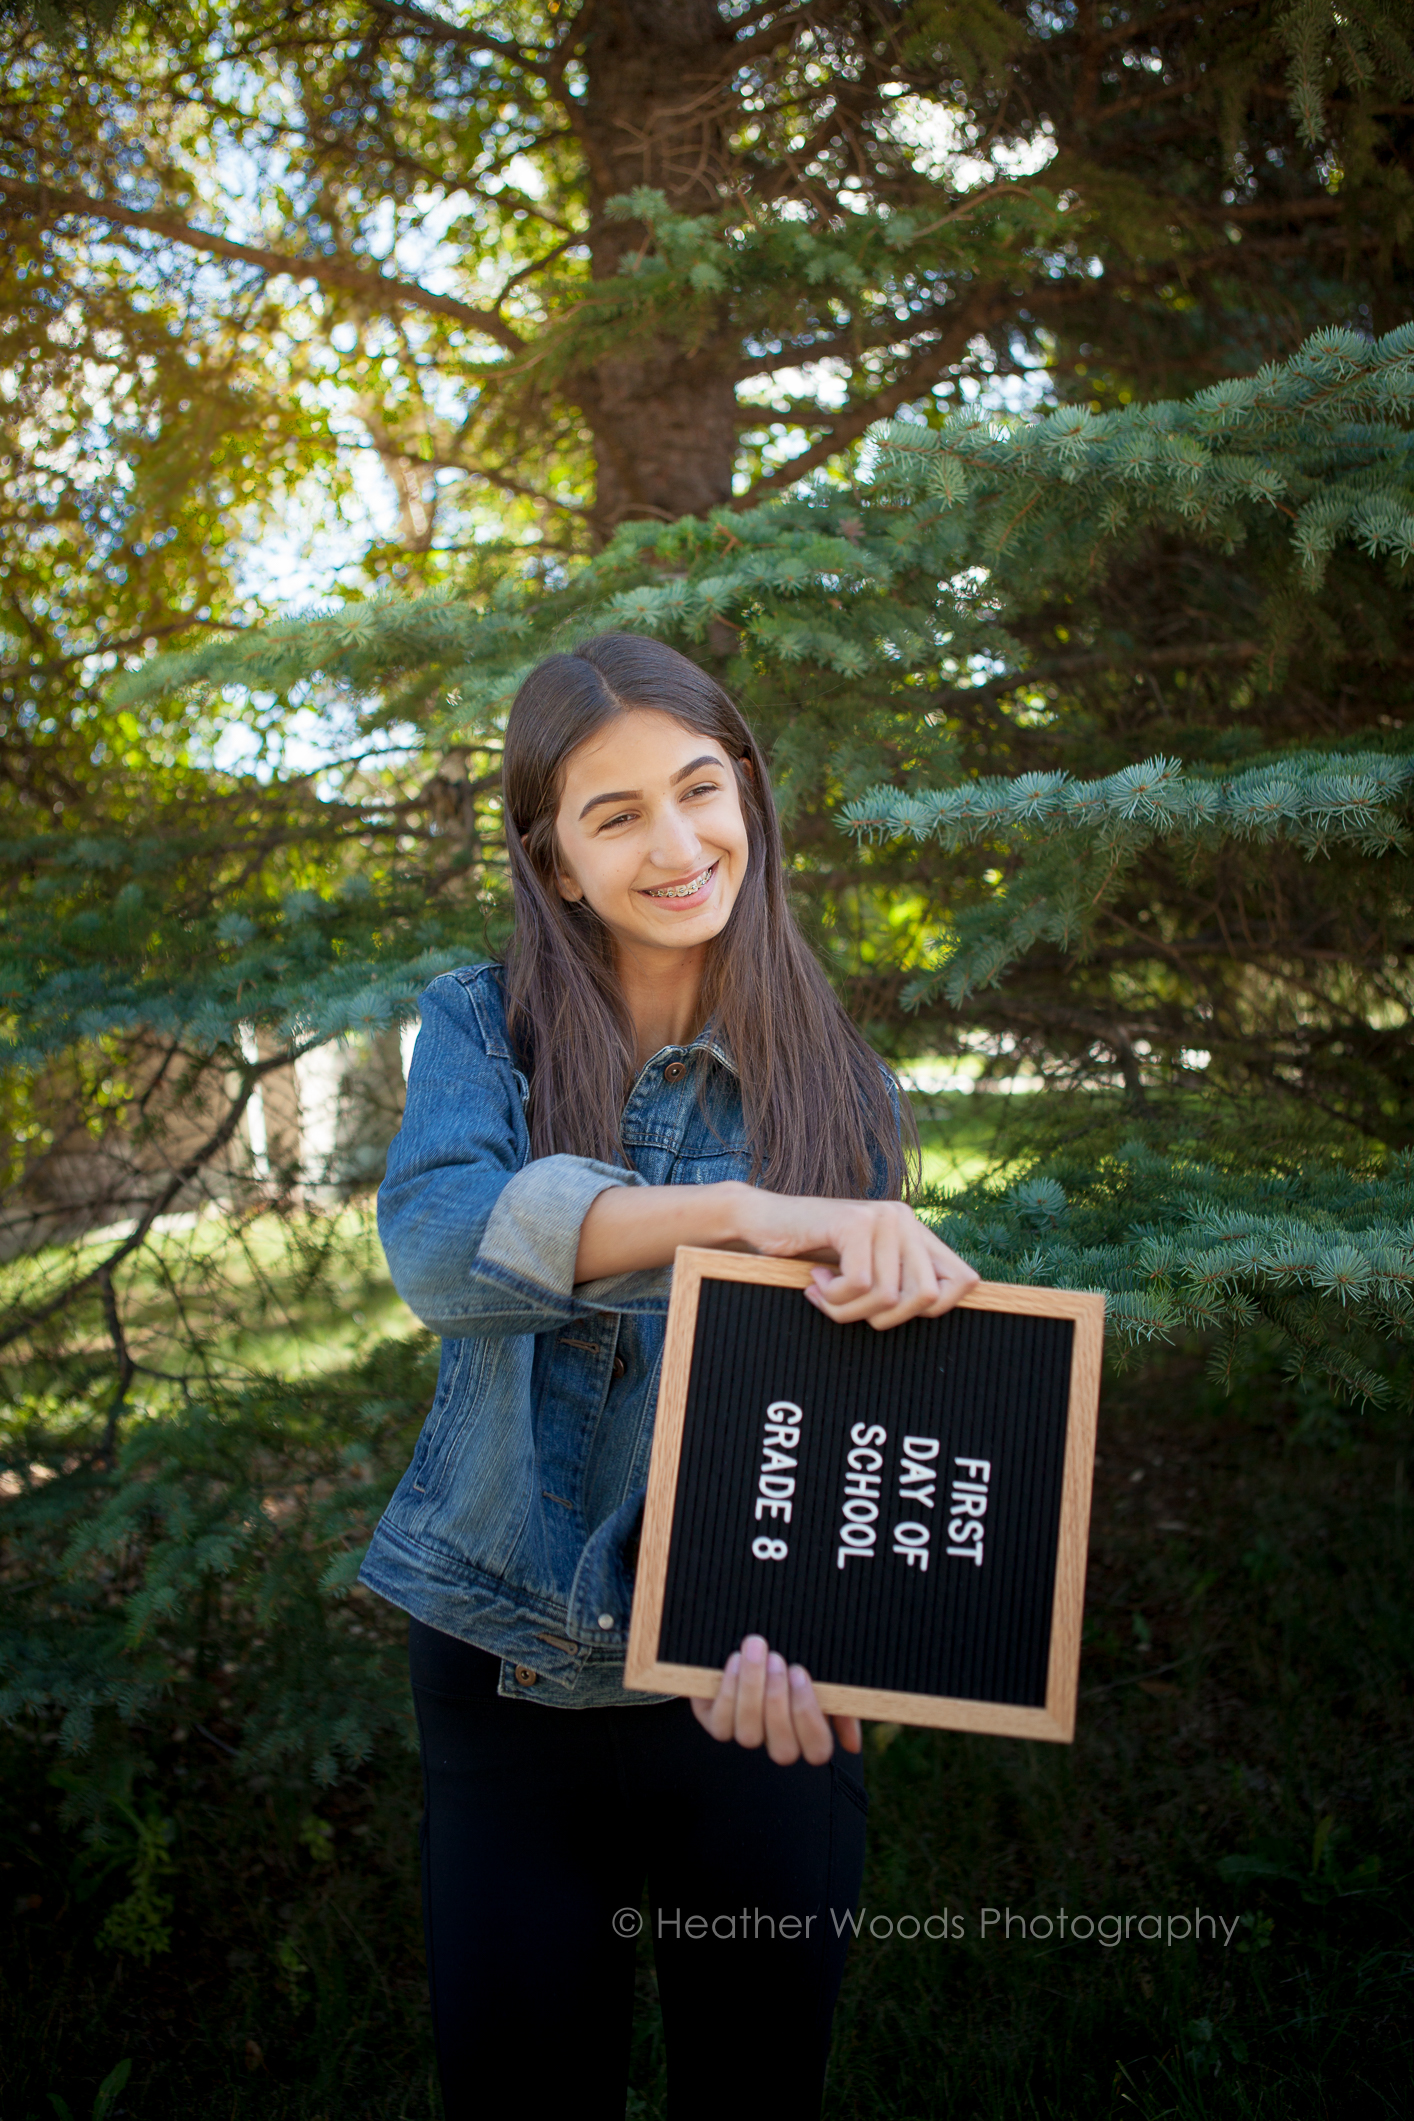
TIP #1: SHOOT IN THE OPEN SHADE, especially when the sun is high in the sky. Another example of sun vs open shade. Notice the “sparkle” in the girls’ eyes in the photo on the right? That is called the catch light, and helps give life to your subject’s face. Getting catch lights is fairly simple when shooting in open shade. I will do another post about these types of details later.
 - Keep your background simple.
Or “K.I.S.S” -Keep It Simple Silly as my Advertising Art teacher always drilled into our heads (but he didn’t say “silly”). This keeps the focus on your child. Here I moved my son to in front of our garage door and in the shade. It might not be perfectly gorgeous backdrop, but it’s not distracting, and keeps the viewers eye on his face/eyes.
TIP #2: A PLAIN BACKGROUND KEEPS THE FOCUS ON THE FACE.

- Focus!
Speaking of face and eyes, always set your camera’s focus on your child’s eyes when shooting a quick and simple portrait like a “Back to School” photo. The human eye is naturally drawn to look at other eyes, and so you want to make sure that the focus is sharp and on the eyes.
TIP #3: FOCUS ON THE EYES
- Take A LOT of photos!
Get in close for a “headshot” to see the details of their faces (above). Move back to get a “full length” shot, to see how much they have grown. And BTW, it’s ok if your kids aren’t always looking and smiling for the camera. Often, when you “continue shooting” even when they start to act silly, look away or start to adjust their hair or clothes, you end up catching a “real moment” or a real look or smile; which is their character.
TIP #4: KEEP IT REAL, AND TAKE A LOT OF PHOTOS.


- RELAX & have fun (and let them relax and have fun too- Like the ABOVE photo) and don’t worry if the photo isn’t PERFECT.
This next photo below, clearly isn’t technically perfect, but because I took a lot of photos, and I let them have fun, I caught a real moment, and I ABSOLUTELY LOVE this playful and yes BLURRY photo. In my opinion, the blur shows movement, and helps prove that they were spontaneously moving, and just having fun. This movement helps to tell the story about how silly these two girls are together, and shows them relaxed and having fun, not stiff and grumpy.
TIP #5: HAVE FUN, AND DON’T WORRY ABOUT PERFECTION.
 BONUS TIP: If you have time, and your kids aren’t hating you, GET CREATIVE.
(More on Creative photos next time)
 SAVE THIS TO READ LATER AND PIN THIS:


Sorry, the comment form is closed at this time.